
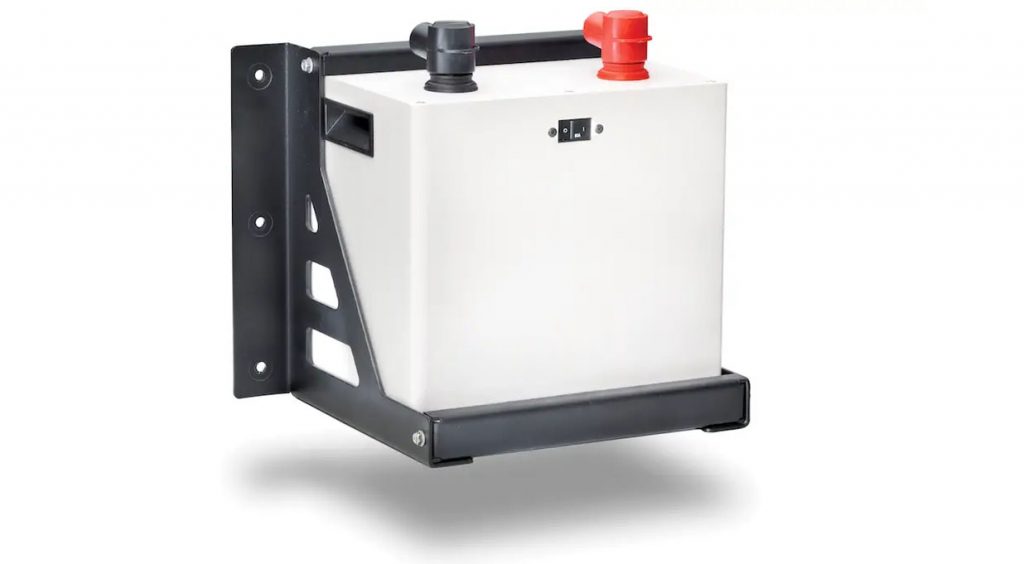
While I was building my battery rack, I must have asked myself 100 times, "is this even going to work?". But now that it's built and mounted to the wall, I can say with confidence: yes! It does work. And it makes me feel like a professional mechanic or something.
1. Cut long 2x4s to length
- Cut long 2x4s to length
This is the first step of your project, and it's a straightforward one. Use a miter saw to cut all of the pieces at 45 degrees on both sides, so that they're now 1" by 3". You'll want two of these for each battery rack you make, so measure out how long your wall mount needs to be and purchase wood accordingly.
2. Line them up and attach 4" wood screws
- Line them up and attach 4" wood screws
Next, you’ll want to line up the top pieces of 2x4s with the lower ones so that they are straight and even. You can use a level if you have one or just eyeball it for now. Once your frame is lined up, screw in 4" wood screws through each piece of lumber into the wall studs.
3. Wrap the whole thing in foam
You will need to wrap the whole thing in foam, or at least around where your batteries are going to be. Foam can be cut with a knife or scissors and you can use glue, tape or hot glue to attach it on. I used hot glue because that's what I had lying around and it worked great!
4. Use self-tapping sheet metal screws to attach sheet metal
- Use self-tapping sheet metal screws to attach sheet metal
- Self-tapping sheet metal screws are available at most hardware stores, and they look like regular wood screws with a small barbell on the head. The barbell is so that you can use it without having to pre-drill holes into the wood (which can cause cracking).
- Use your drill to drive these into the wood in strategic places along the rack.
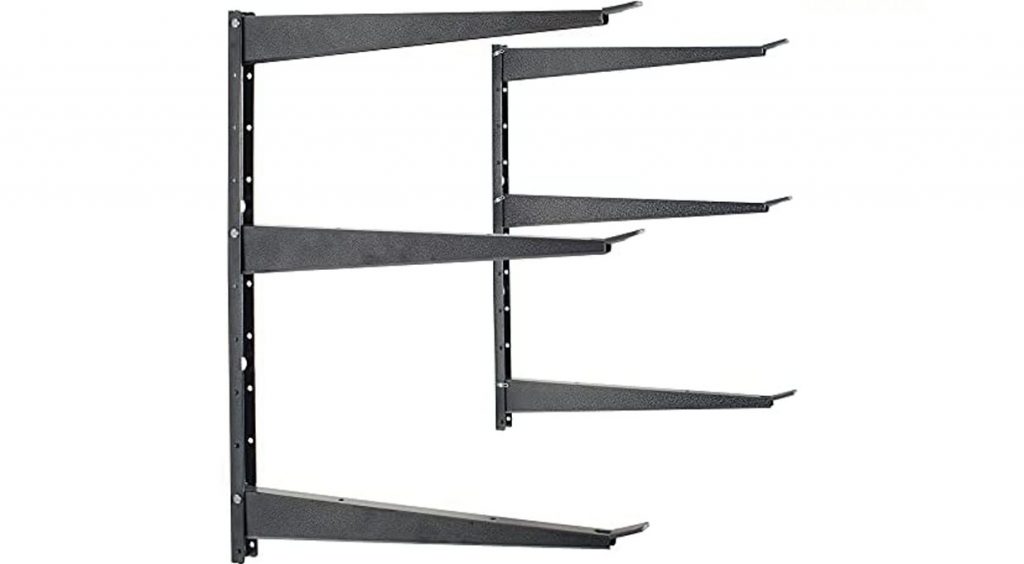
5. Mounts are necessary -- I used my battery holes and mounted them straight into the wall
Once you have the size and location of your holes for the rack determined, it's time to mount those mounts. Mounts are necessary for extra support that will hold up a bunch of weight when you add batteries to your new wall-mounted battery rack.
Mounts should be attached to wall studs with lag bolts and washers. This will ensure that the weight of your batteries doesn't pull out any important screws or nails from the wall, causing an unfortunate accident where someone trips on them and falls down stairs (or worse).
To make sure that everything is straight and level, use a level as a reference point before drilling any holes into anything else!
It's actually quite simple!
It's actually quite simple!
I designed this rack to be a wall mounted battery rack but you can use this design for any type of battery, any size battery, and any number of batteries.
Conclusion
As you can see, building a battery rack for your garage is not as difficult as you might think. The only thing I would suggest is making sure to measure twice and then cut once so that everything fits together properly in the end. Also, if you're using plywood instead of OSB (as I did), make sure it's at least 1/4" thick so it doesn't warp when screws go through!